Wilderness Survival 201
It’s amazing what you can learn in just 2 hours, even with the smooth sounds of Gloria Gaynor’s “I Will Survive” running in the background of your mind.
I signed up about 1.2 seconds after receiving a notice that Pok-O-MacCready Outdoor Education Center (PMOEC) and Champlain Area Trails (CATS) were partnering up to host a Survival Skills Workshop at the Blueberry Hills Trail system in Elizabethtown. There was a family-friendly morning session followed by a 2-hour afternoon session for adults billed as “an introduction to safety and comfort in the outdoors.” The adult session would cover some survival scenarios, and preparation for situations like when a day trip becomes an unplanned overnight.
I was really interested in learning about this. Like many of us Adirondackers, I hike. Usually short day hikes, but last summer I joined two of my friends to tackle three Adirondack High Peaks in one day - an almost 20-miler. It occurred to me when we were about 10 miles from our car that if something happened to us - an injury or we were late or some weather anomaly - that I wasn’t really sure what we’d do, or if we had brought the proper gear to do it.
Also, I have this survival bracelet; one of a matching set that my husband and I acquired on a random vacation. So I was hoping to learn how it was going to help me survive.
Our leaders for the day were Zack Floss, our primary instructor, Alex Mihavics, Assistant Director at PMOEC, and Brian Degroat, the big cheese, Executive Director of the Outdoor Education Center, who I met when I visited The Crux - Pok-O-MacCready’s indoor rock climbing center.
Exploding Packs
This workshop provided me with a few new terms to add to my outdoor vernacular, too. After introductions, Zack began by “exploding” his pack.
This explosion was not related to fire building, believe it or not. Rather, exploding your pack means dismantling it by systematically removing every item inside the pack to take inventory and organize. Zack suggested at the end that this is a good thing to do frequently to assess, add, and update supplies.
In this case, of course, it served as a good way to demonstrate for us the absolute essentials that we should always bring on an outdoor adventure.
Zack began by explaining the Survival Rule of 3s.
On average, a person can only live:
- 3 minutes without air,
- 3 hours without shelter (this includes clothing),
- 3 days without water,
- and 3 weeks without food.
The Rule of 3s informs the planning process, establishes priorities in an emergency and the specific supplies one should bring on any outdoor excursion. There were a few items that came as a surprise to me, and a few I’m psyched to add to my inventory.
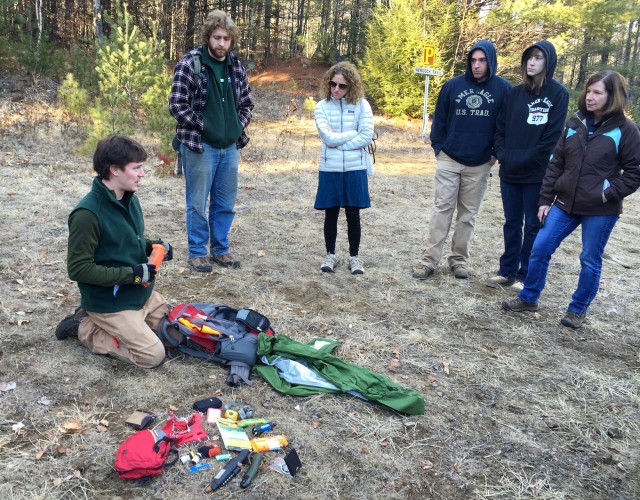
Here is a list of things that exploded out of his pack (Disclaimer: this list is from my memory, I’m no expert… yet!)
- Phone - even if turned off to preserve battery, could come in handy to call for help.
- First aid kit - As part of the “explode frequently” speech, it is important to make sure that your first aid kit contains non-expired medications if applicable and that any items used such as bandages are replaced. The kit should also include scissors - the kind with a safety end.
- Emergency blanket - those tiny metallic-looking folded-up blankets are lightweight, small, and can mean the difference between life and death.
- Water filter.
- Water filtration pills - these take longer to decontaminate the water than a filter, but are more effective than the quicker direct filters. (Also remember that boiling water kills bacteria, too.)
- Water bottle/container. Collapsable containers to carry water, too.
- Food. Zack pointed out the importance of maintaining levels of fuel for energy and sharp thinking, and showed us a couple of types of energy bars, pointing out their ingredients. (There was a lot of talk about trail mixology.)
- Lighter.
- Another lighter.
- Jackknife.
- Straight-blade knife (acquiring one of these pronto).
- Flint (also getting pronto).
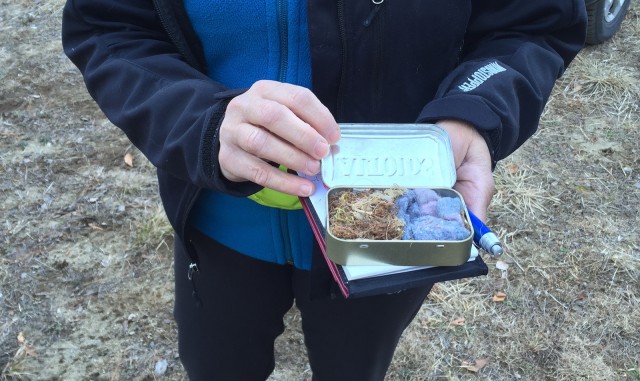
- Tinder (this was cleverly disguised as a tin of Altoid mints that actually contained some dryer lint and tiny pieces of dry, flammable wood fibers).
- Compass.
- Another compass.
- Folding saw.
- Rain jacket.
- Plastic bags - to keep phones and other various things dry.
- Traction device like microspikes (any time but summer).
- Something bright - for rescue and/or hunting season.
- Headlamp(s) and batteries.
- Another flashlight.
- Your wallet. Bring identification WITH you.
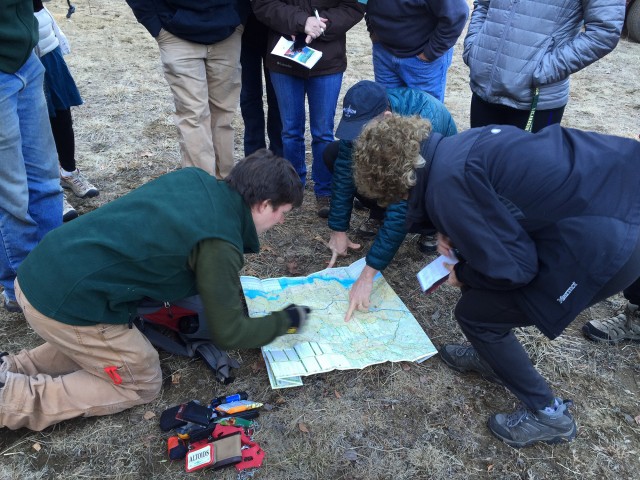
- Map - to go with the compass.
- Paracord - I looked this up, and the name comes from “parachute” cord. This is a general purpose utility cord made of lightweight nylon. The braided sheath has a high number of interwoven strands for its size and gets that name because it was originally used in the suspension lines of parachutes. It is also the material that my survival bracelet is made from - NOW we’re getting somewhere.
Notice some duplications? They were on purpose. Redundancy in toting multiple fire-starting materials and way-finding and cutting tools is a smart tactic.
Also - tell someone where you’re going before you go. Seems obvious, but that gives rescuers a big head start.
Gimme Shelter
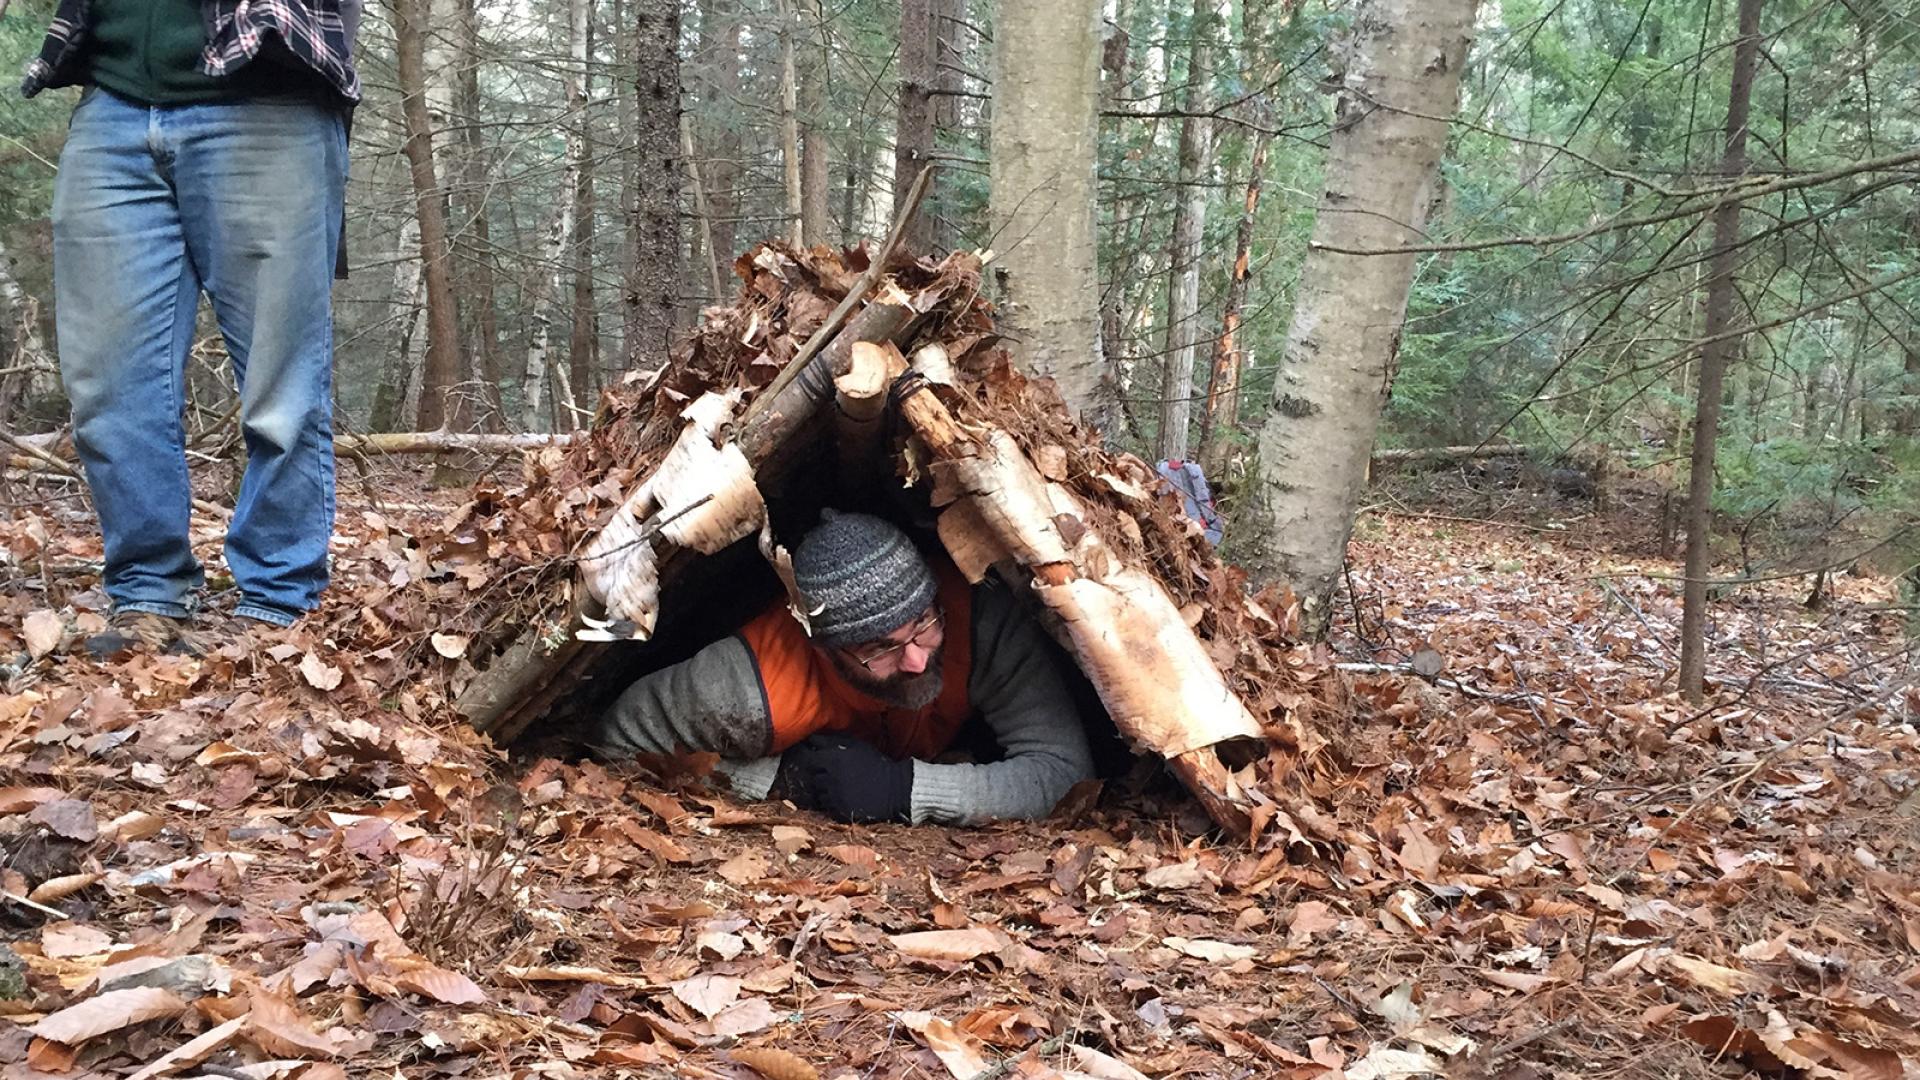
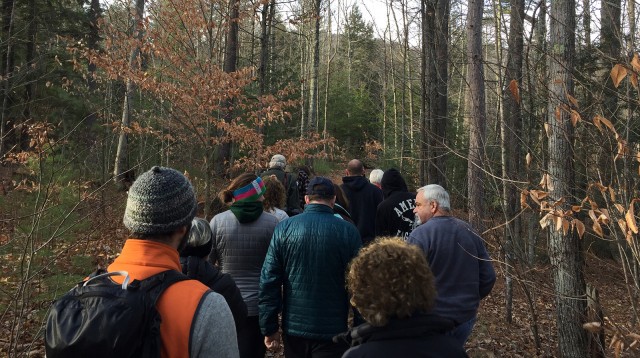
Zack repacked his supplies and we headed down one of the Blueberry Hills Trails to a location just off trail where he said that he and his colleagues had already constructed an emergency shelter to show us. We veered off the trail, and I did not immediately see the shelter he was referring to, until I walked around to the other, open, side of it.
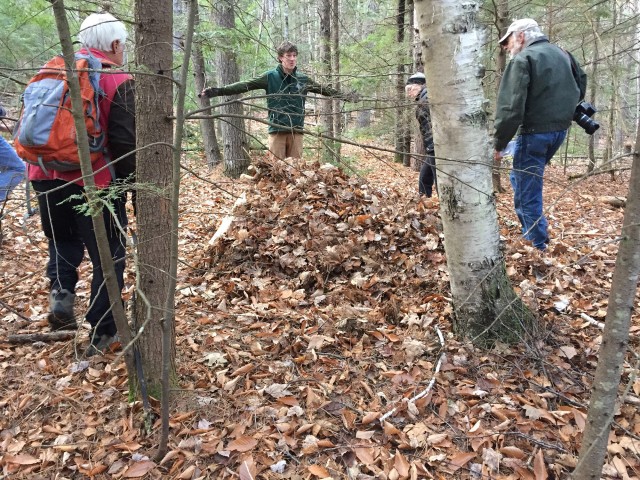
It was a very short teepee-like structure covered with leaves, just large enough for one person to fit inside. Brian demonstrated by getting inside, showing us just how to make sure to conserve maximum warmth using this structure by sort of curling up.
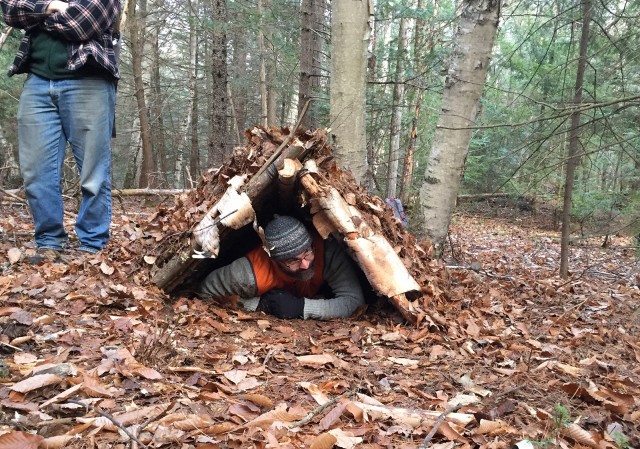
To show us how they built it, they let us watch as it was dismantled. And this is where I was made aware of what I’ll call “extreme leave no trace,” or LNT.
They illustrated how they had gathered the materials that they used to construct the shelter from various nearby spots - not just in the immediate vicinity. And they returned those materials to the woods in the same way, scattering them far in all directions. This “extreme” LNT is just one level above my assumption about the term. I might have been thinking of “carry it in, carry it out.” Regardless, one should take both of these approaches for MOST scenarios in life, right?
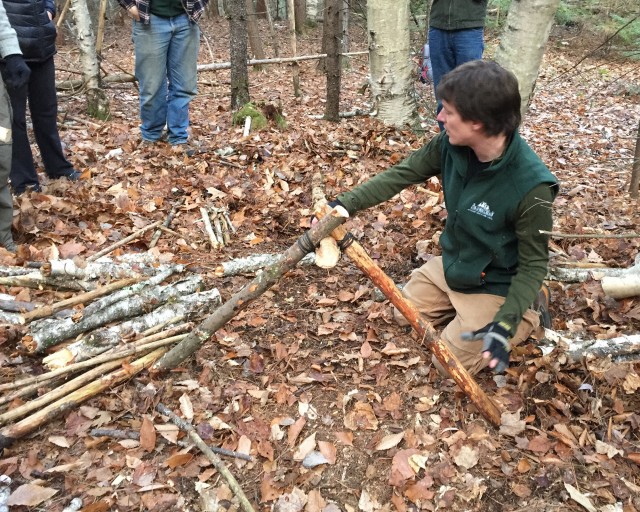
As they dismantled the shelter, it was apparent that it was constructed at its base with three sticks bound together at one end with paracord (one use for my bracelet!). Two sticks acted as legs that formed the entrance, and one longer stick that formed the ridge of the shelter. On both sides of that ridge, they placed a series of smaller sticks tight next to each other to form a “roof.” On top of that, they placed birch bark as a sort of roofing, and then leaves - a lot of them. That’s why I couldn’t see it from the trail; it was camouflaged.
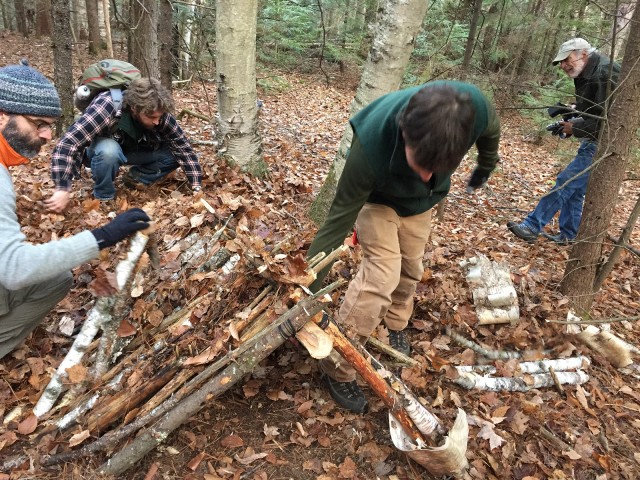
Some of us attempted to make our own structure base using the cord and three sticks each, which really helped to brand the process into my mind.
These are the other things I learned:
- 3 feet of leaves on top of the shelter renders it waterproof.
- In winter, instead of the leaves, snow can be used for very effective insulation.
- It is important to have something underneath you to prevent the ground from stealing the warmth of your body. Another layer of leaves, maybe your rain layer, etc.
- Choose carefully the location of your shelter; i.e. some overhead branches are good, but not any that might fall in high winds.
- Paracord is a great thing to bring along. It can easily be cut to length with one of the many knives you bring along, and wound around the ends of the sticks to create a very strong structure. Otherwise, you might use shoelaces, which might require knowing knots to connect them together.
- I learned from Zack a knot to tie shorter pieces of cord together to make a longer section, but I don’t remember the name of it. You’re welcome.
Making Fire - Out of Nothing at All
After Zack and Alex and others distributed the leaves and sticks in responsible LNT style, we returned to the trail and walked a bit further to learn about making fires. We were running a little bit late, primarily because our group was so inquisitive. With a vote, we decided to continue and learn how to make a fire. Not just any fire, but level 201 fire making - with wet materials.
That day, it wasn’t really all that wet, but Zach brought along his water bottle to fix that.
He had handy garbage can tops upon which to make the fire so that we LNT’d this demonstration, too. He doused some white birch bark; something we’re all familiar with as a good fire starting material, and showed how it not only would catch on fire, but that it burns for a relatively long time because of the sap inside it.
He said we don’t need to know the names of the species, but just to just look around and find stuff of a fibrous nature by taking the bark or outside layer off various sticks and twisting and playing with it to break it up. In this way you create some tinder - some with sap. He also demonstrated how this found material is much more effective if you remember to bring your Altoids with you.
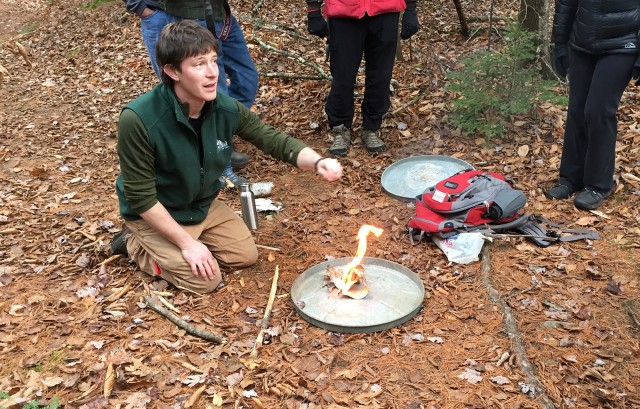
Noted in the fire-making session:
- It’s good to have matches and lighters - they are certainly effective. But I really was amazed at the sparks that the straight-blade knife (non-folding) in combination with the flint created to light the tinder. (Added to shopping list).
- We learned why bringing along a straight knife is important. It can be used as a hatchet to split sticks into smaller pieces of kindling - getting to the dryer, inside parts of the wood.
- I don’t speak latin or Klingon or whatever, but though he said that WE don’t need to know the species’s names, I noticed that Zach uttered, in an almost Rain Man manner, the scientific names for various things under his breath throughout the session. That was impressive.
One of the thought-provoking conversations that Alex and Zach introduced was the chicken-and-egg question of whether to prioritize making a fire or a shelter. I think we concluded that a fire takes a long time to nurture, but once it is basically started, can be urged along sporadically while you make your shelter. One could warm themselves and heat water in this way in while making the shelter, too.
In Conclusion, To be Continued
Overall, a big takeaway from this workshop (aside from the straight-blade knife thing - did I mention I am getting one of those?) was attitude. Licensed guides know this, but a positive approach is very powerful. If you find yourself in a survival situation, the mind has a powerful effect on the outcome of that situation. Thinking positively is very important; and easier to maintain if you are prepared with the skills and supplies to bolster your confidence.
-Kim Rielly is the director of communications for the Regional Office of Sustainable Tourism, and is now also the proud owner of an Altoid container.

